Add a Configuration to Your Template
Configurations inherit values from the template so you can simply execute the configuration or choose to override specific instructions, making a configuration fully customizable. Using templates makes managing multiple configurations simpler.
To add a configuration to your template
1. Open your template from the list on the Templates tab.
2. Click the Configurations tab.
3. Click Add a Configuration button.
4. Enter a name for your configuration, then click Go.
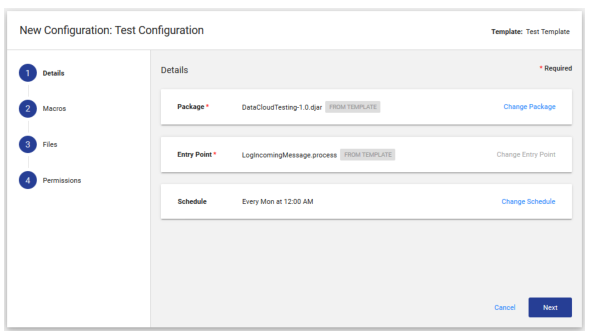
1. Details
1. (Optional) The package name is inherited from the template by default. You may change the package to customize your configuration.
2. (Optional) The entry point is inherited from the template by default. You may change the entry point to customize your configuration.
3. Click Add Schedule to create the schedule for your configuration.
You may choose from these options:
• On Demand
• Interval
• Daily
• Weekly
• Monthly
• Custom
4. After setting up your desired schedule, click Save.
5. Click Next.
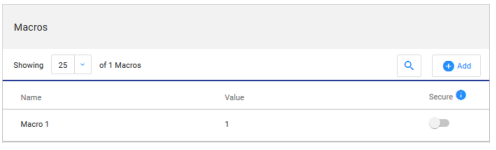
2. Macros
You may either add a macro or import a macro. Follow the appropriate procedure below.
To add a macro
1. Click Macros.
2. Click the Add button, then select Add Macro from the drop-down.
3. Enter the macro name
4. Provide a value, if needed.
5. If the macro needs to be secured, click the toggle on the right.
6. Click Next.
To import a macro
This method only supports XML and JSON files. For more information about macros and how they are used, see the Actian DataConnect documentation at:
http://docs.actian.com/dataconnect/11./index.html.
1. Click Macros.
2. Click Add.
3. Click Import Macro File from the drop-down.
4. Browse for your macro file locally, select the file name, and click Open.
5. Click Next.
3. Files
To add files to the template
1. Click Files.
2. Either drag and drop files onto the Files pane or click Browse Files to browse locally for your files.
4. Permissions
Note: For users who do not have Administrator permissions, the permissions step is grayed out, indicating that permissions may not be changed. Contact your administrator to make changes to your administrative permissions.
To set permissions for groups and users to run the configuration
1. Click Permissions.
2. Add specific users by clicking Add, selecting the user from the drop-down.
3. Set individual permissions by clicking the toggles for Read, Write, and Run.
4. Click Create Configuration to finish creating your configuration.
Not Ready to Finish the Configuration? If you are not ready to make the configuration available, you may either delete it or save it as a draft. Click Cancel to choose. Saving as a draft will set the configuration to inactive. To make it active, in the Configurations list, you must click the configuration name and then click the Active toggle to On. This will make the configuration active.
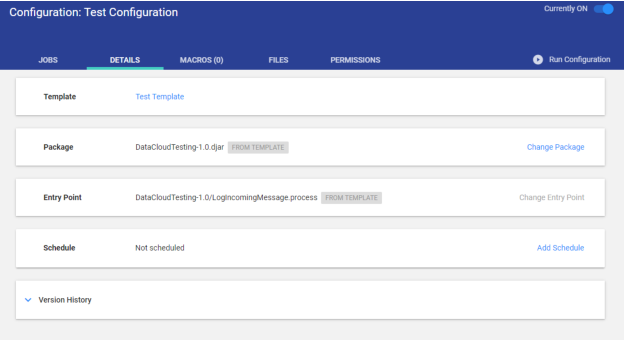
Your newly created Configuration is displayed.