SSO Configuration
This document provides step-by-step instructions on how to configure Single Sign-On (SSO) on Actian Data Observability. Follow the steps below to set up SSO seamlessly.
Step 1: Navigate to SSO Settings
- Log in to the Actian Data Observability.
- Go to Administration.
- Click on Single Sign-On (SSO) Settings.
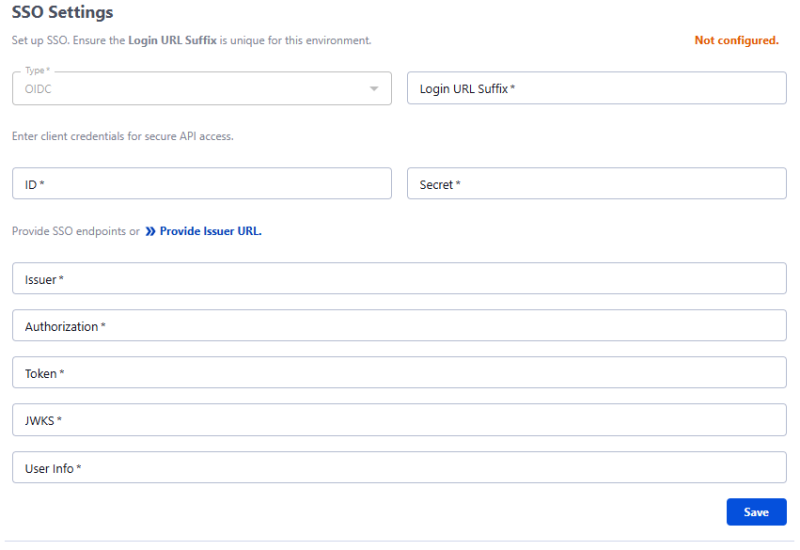
Step 2: Configure SSO Details
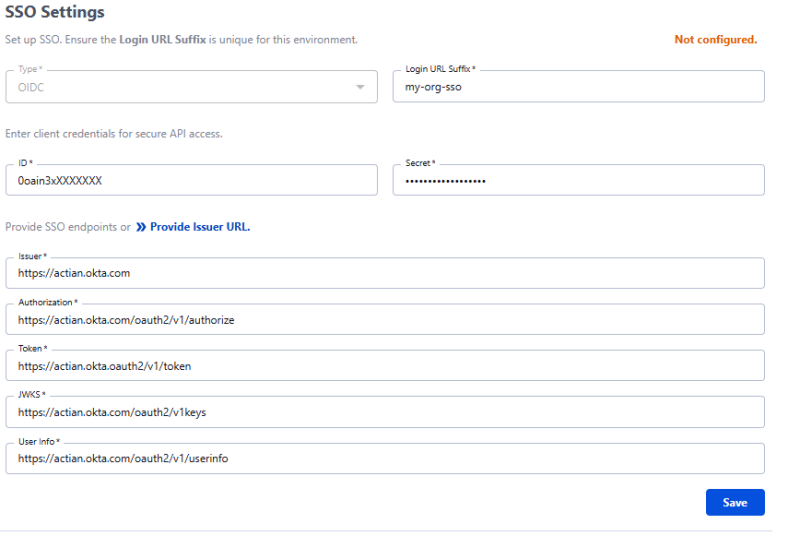
- Enter a unique Login URL Suffix
- For example, if company name is ACME corporation and the environment is stage project instance, then you can use a unique name like acme-stage. And hence the Login URL Suffix will be: acme-stage, resulting in a login URL similar to: https://data-observability.actian.com/login/acme-stage)
- Provide client credentials:
- Client ID: Enter the ID provided by your IdP.
- Client Secret: Enter the secret key provided by your IdP.
- Provide SSO endpoints or click Provide Issuer URL:
- You can enter the below details manually:
- Issuer: Enter the Issuer URL from your IdP.
- Authorization: Enter the Authorization endpoint.
- Token: Enter the Token endpoint.
- JWKS: Enter the JWKS (JSON Web Key Set) URL.
- User Info: Enter the User Info endpoint.
- OR Click on Provide Issuer URL to open a modal dialog.
- Enter the Issuer URL from your IdP and click Retrieve Endpoints.

- Click Save to store the configuration.
- You can use the toggle button to Enable/Disable the settings after saving. You can also update or delete the setting at anytime.
Step 3: SSO Testing and Verification
- Navigate to the login page
- Example: https://data-observability.actian.com/login/my-org-sso
- Click on Sign in with IDP.
- You will be redirected to Issuer URL. Enter the required details and click Sign In.
If authentication is successful, you should be redirected to the Actian Data Observability dashboard.
Last modified date: 03/20/2026