Mapping Fields Using Simple View
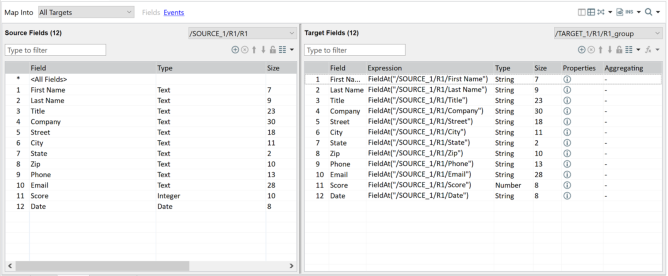
The Simple View displays the source schema and target schema in two panels. The left panel displays the source data and the right panel displays the target data. This view is often referred to as the side-by-side view.
An example is as shown.
To view the map in Simple View:
1. On the Sources and Targets tabs, select the source and target connectors and establish the connections.
2. Click the Mapping tab.
By default, the Mapping tab is displayed in Simple View with source and target fields next to each other.
Note: If you are in Advanced View, click  to change the view to Simple View.
You can do the following:
• Map Navigator: Displays the source and target instances. By default, a target is selected as a node.
• Map Into filter: Allows you to select the target you want to map into. This includes mapping into lookups to set keys, and mapping into temporary targets to create intermediate, in memory data. Based on the selected target, the source side displays only the sources that can be mapped to the chosen target. By default, All Targets is selected. For a lookup type target, only the main sources, constants, and intermediate targets that are above the selected lookup are displayed in the source tree.
• The target selected in the Map Into filter is always in synchronization with the map node selected in Map Navigator and vice-versa.
• Source Fields: Click All Fields node in the Source tree view to display all the source fields.
• Target Fields: Click All Fields node in the Target tree to view all the target fields.
• Type to filter: Filters the row data based on the text or value that is typed in the text box. This is applicable only for Reference and Field columns.
• Events: Click Events to define source, record, and/or target events.
Using drag and drop operation, you can map valid source fields and constants to appropriate target fields as applicable. You can also click  and use Match By Name and Match By Position options.
Note: When you drag and drop a field or a constant onto a target field expression cell, it overwrites an existing target expression. When you drag and drop a field onto any cell to the left of a target expression, it either adds the dropped field or overwrites the existing target field based on the selected icons  or
or  .
.
You can add, edit, delete or reorder table fields. The icons are enabled as appropriate. For more information, see Dragging and Dropping Fields From Source to Target.
Note: In All Fields view, these actions are disabled. Only drag and drop operation is allowed from source to target.
Last modified date: 01/03/2025