Start or Stop Recording Queries
The concept of recording queries is described in
Recording Queries. You record queries using the
Start Recording Queries Dialog.
To record queries
1. Click the Record Queries button in the upper right corner of the Director window:
2. Enter a file name to which you want to record the generated SQL.
This can be a new or existing file name:
• If you want to record information to a new file, enter a unique name. Click the browse button to select a location to store the file.
• If you want to append the information you are recording now to an existing file, specify that file name and select Append.
• If you want to overwrite an existing file with information you are recording now, specify that file name and clear Append.
3. Select Make compatible with TM and NETUTIL if you want the recorded SQL to be compatible with Terminal Monitor (sql) and the netutil tools.
4. Select which type of queries you want to record.
5. Select whether you want Start, Stop or DBA Utilities to be recorded.
6. Click Start.
7. Perform the operations whose background SQL you want to record.
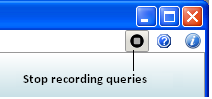
8. Click Stop Recording to end the recording session:
The recorded SQL is stored in the file you specified.
To edit saved queries, see
Open an Existing Query.