Report Margins and Alignment Guides
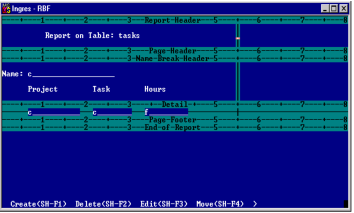
The report's bottom margin is identified by the line marked End‑of‑Report. The report's right margin is identified by a vertical line that is marked End. Initially, the right margin line is located beyond the right edge of your screen, although in the preceding figure it has been moved so that you can see it.
Use the Move operation, as described later in this chapter, to move these margins and thus expand or contract the size of your report. Both report margins, as well as the report section dividers, optionally display ruler marks every fifth column or row, and a decimal digit every tenth column or row. Use these rulers as alignment guides to help you determine the coordinates for report components.
The Report Layout frame also provides optional horizontal and vertical straight edge alignment guides for aligning report components. If straight edges are turned on, the vertical and horizontal straight edges appear initially in the last column of the report specification and the last row of the Detail section, respectively. Move straight edges with the Move operation, as you would a piece of trim or other report component.
The following figure shows straight edges aligned on the Hours column and rulers turned on. For best results, use a monitor with a line graphics character set.
You cannot delete the section markers from the Report Layout frame. However, you can turn rulers and straight edges on or off independently of each other by choosing the Rulers operation on the Report Layout frame. On the pop-up menu, set each alignment guide to y (yes) or n (no). Regardless of whether the alignment guides are set on or off, the section markers, margin lines, and straight edges do not print on your report.