Apply a Setup Frame
To apply a setup frame to your frame or frame template
1. Open the desired frame in the Frame Editor.
2. Click the frame's SetupName property in the Property Inspector.
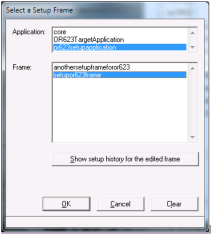
The Select a Setup Frame dialog appears.
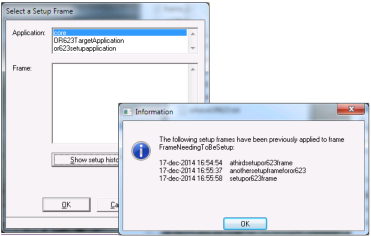
3. If the frame already has a SetupName associated with it, you may want to see the setup history for your frame. Click Show Setup History for the Edited Frame.
A popup window displays the previous setups applied to the frame, in timestamp order. You may copy and paste the text list from this popup. Close the popup before continuing.
4. Select an application and a setup frame from the Application and Frame list fields, respectively.
When you click any of the setup frame names, any description that was applied to that frame's Remarks field when created will appear in the status bar, to help you choose.
5. Click OK to continue.
The frame you specify will be called and displayed.
Note: The Clear button clears the SetupName and any setup history from your edited frame or frame template. It does not undo any changes, setup or otherwise, in the frame. To do that, use the standard Undo and Revert to Last Saved options in the Frame Editor. The Clear button requests confirmation of the action before continuing.
6. Perform whatever operations you have defined for the Setup Frame. Close it when you are finished.
For most purposes, a Setup Frame should have only a Go and a Cancel button. If it has a more complex interface with optional features, the history feature already described will be insufficient to capture what changes have been applied to your frame, and you will need to separately record the options and values that were specified for the setup.
Any changes that the setup frame processing has made to the edited frame or frame template passed to it will appear in the Frame Editor and Property Inspector, if the changed properties are ones typically displayed during editing.