|
1
|
Access Function Executor from the operating system Start menu or Apps screen or from the Tools menu in PSQL Control Center.
|
|
2
|
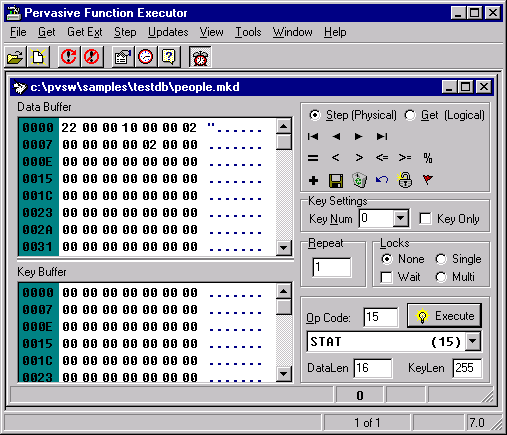
The main window (Figure 12) appears.
|
|
2
|
|
1
|
|
2
|
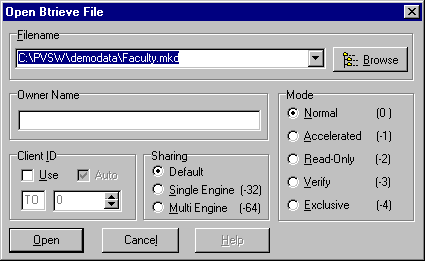
Click Browse.
|
|
1
|
|
2
|
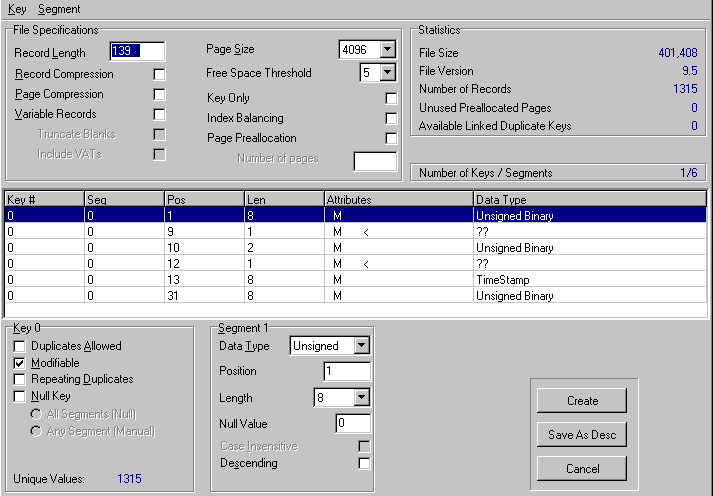
You can manipulate keys from this dialog box as well. You can Add, Create, or Insert Segments from the Key menu. You can also save the new file as a description for use with BUtil create. Select Save As Desc and indicate the name and location where you would like the file saved.
|
|
3
|
To create the file, click Create. This will open the file and display a message indicating success.
|
|
1
|
Click the Create icon on the main toolbar; or, if no file is open yet, you may click File and then New, as before.
|
|
2
|
If a file is already open on screen, a drop down box will appear. Choose Create New File from Scratch.
|
|
4
|
Start by adding a new Key using the Key menu, or press Ctrl-A.
|
|
7
|
Now click the Create button to execute the B_Create (14) operation. This will automatically open the file on screen as well.
|
|
1
|
|
2
|
|
3
|
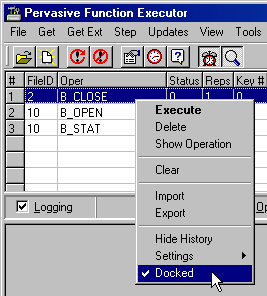
In the history items window, right-click the display and check or clear the Stays On Top selection.
|
|
2
|