|
|
|
Table 8
|
|
2
|
|
4
|
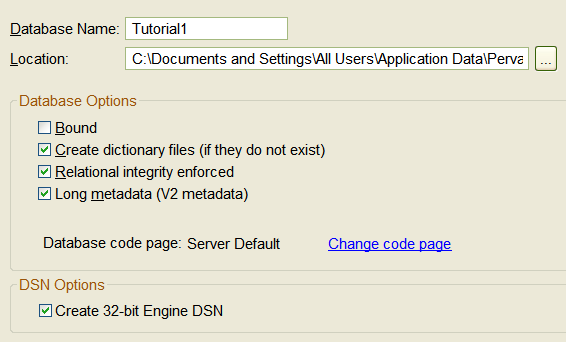
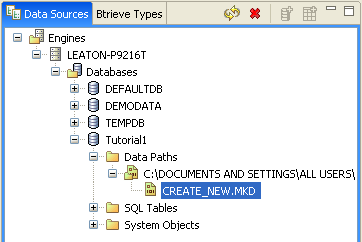
Click Finish to create the database and the empty DDF files in the location you specified.
|
|
2
|
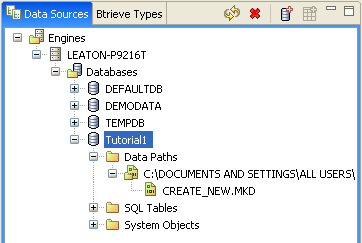
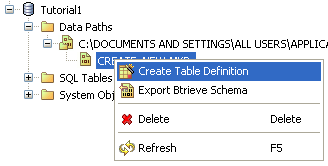
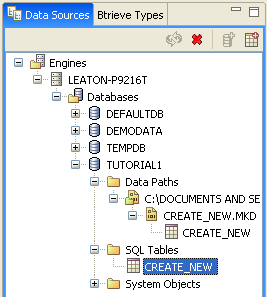
Right-click the CREATE_NEW.MKD folder containing the file, and select Create Table Definition.
|
|
•
|
|
•
|

|
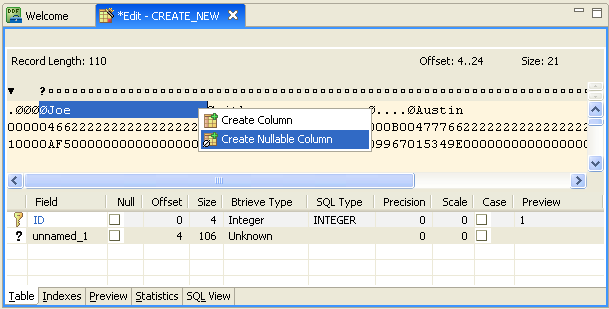
3
|
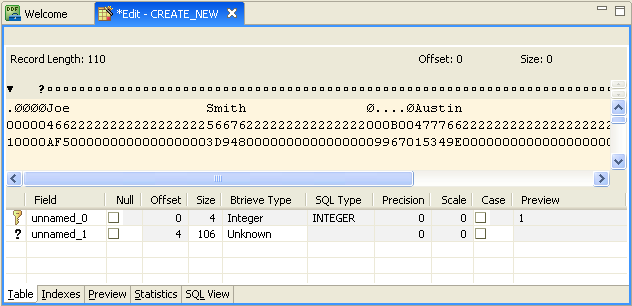
Right-click and select Create Nullable Column.
|
|
•
|
|
•
|

|
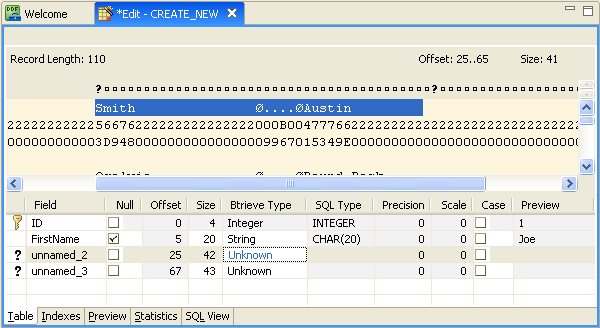
7
|
Right-click and select Split Column.
|

|
•
|
|
•
|
|
10
|
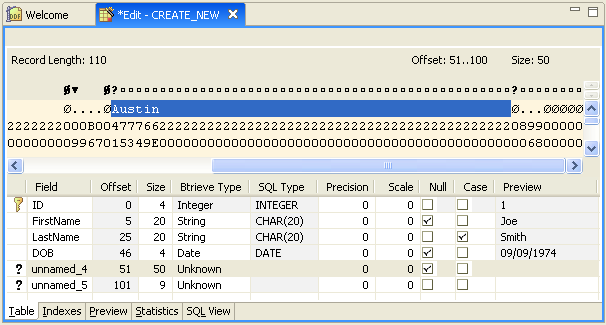
Right-click and select Split Column to split the unnamed_3 row.
|
|
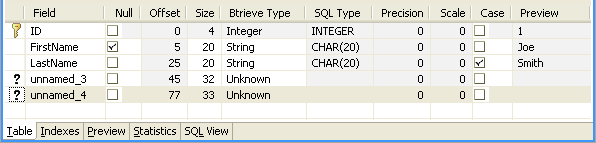
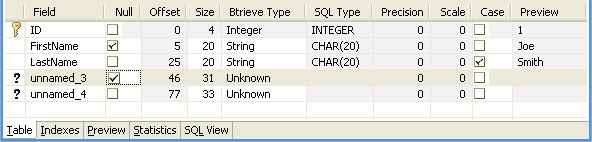
11
|
Select the Null checkbox so that the null indicator byte is reserved at the first of the record.
|
|
•
|
|
•
|
|
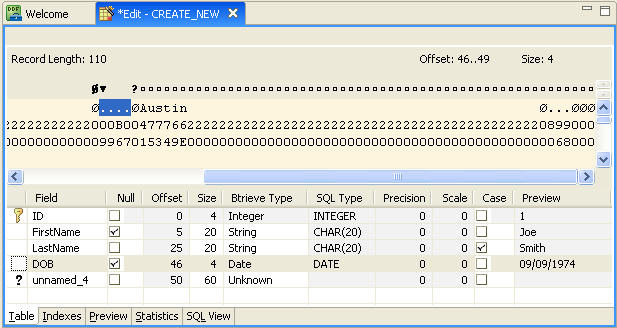
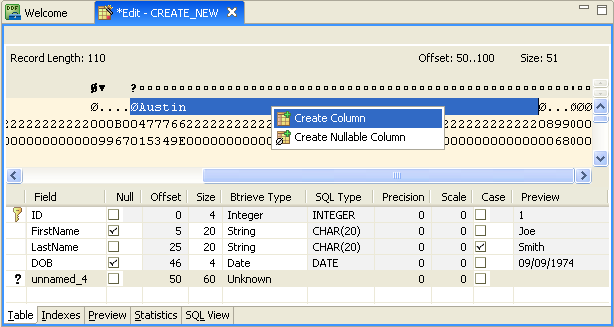
15
|
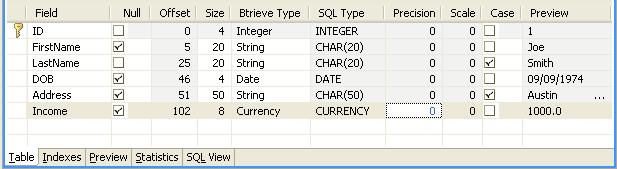
Right-click and select Create Column.
|
|
16
|
Select the unnamed_4 row, and select the Null checkbox.
|
|
•
|

|
19
|
|
1
|
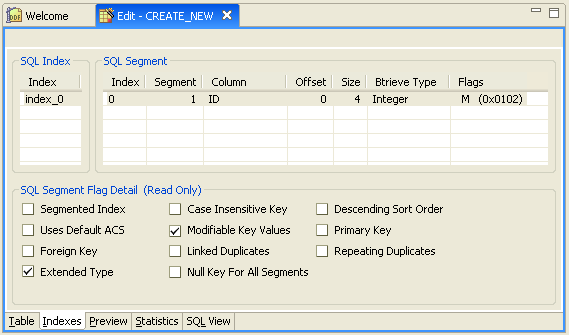
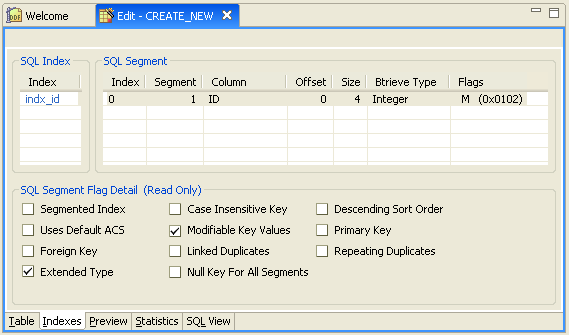
Click the Indexes tab in the Table Definition Editor.
|
|
4
|
|
1
|
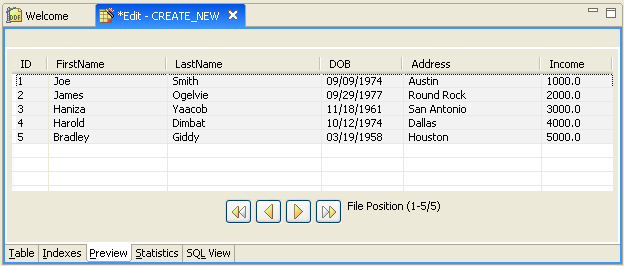
With DDF Builder still open, click the Preview tab in the Table Definition Editor.
|