|
2
|
|
4
|
|
5
|
Click Finish.
|
|
2
|
|
1
|
|
2
|
Click the Columns page tab.
|
|
1
|
|
2
|
Click the Indexes page tab.
|
|
1
|
|
2
|
Click the Foreign Keys page tab.
|
|
1
|
|
2
|
Click the SQL View page tab.
|
|
1
|
|
2
|
|
3
|
|
1
|
|
1
|
|
1
|
|
2
|
Right-click an existing column row above which you want to insert a new column.
|
|
3
|
Click Insert Column.
|
|
4
|
|
1
|
|
2
|
|
3
|
|
1
|
|
1
|
|
3
|
Click Drop Column.
|
|
4
|
|
1
|
|
2
|
Click in the Column Name cell for the desired column.
|
|
5
|
|
1
|
|
2
|
Click in the Type cell for the desired column.
|
|
6
|
|
•
|
|
•
|
|
•
|
|
1
|
|
2
|
Click in the Size cell for the desired column.
|
|
5
|
|
1
|
|
2
|
Click in the Precision cell for the desired column.
|
|
5
|
|
1
|
|
2
|
Click in the Scale cell for the desired column.
|
|
5
|
|
1
|
|
2
|
Click the option box in the Null cell for the desired column.
|
|
|
|
|
|
|
|
|
|
3
|
|
1
|
|
2
|
Click the option box in the Case cell for the desired column.
|
|
|
|
|
|
|
|
|
|
3
|
|
1
|
|
2
|
Click in the Collate cell for the desired column.
|
|
5
|
|
1
|
|
2
|
Click in the Default cell for the desired column.
|
|
|||
|
|||
|
|||
|
1 The names are case insensitive. NOW() and now() are equivalent. The parentheses are required. That is, NOW is invalid but NOW() is valid.
|
|||
|
5
|
|
1
|
|
4
|
|
1
|
|
2
|
Click Add.
|

|
4
|
In the Columns list, select the Column to designate for the Index or Index Segment.
|
|
6
|
|
1
|
|
2
|
Click Add.
|
|
4
|
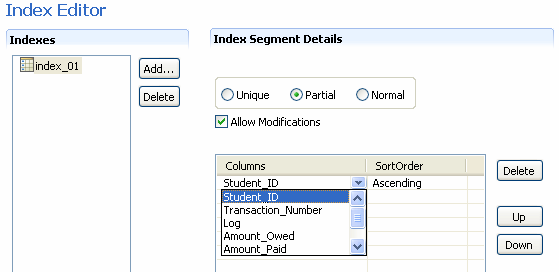
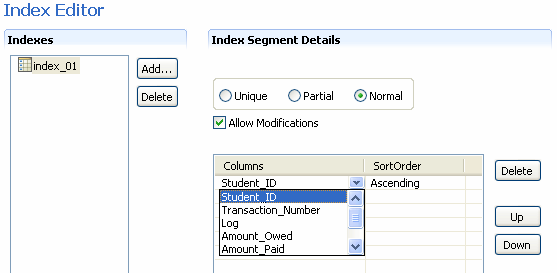
Select Unique in the Index Segment Details area to designate the index as unique.
|

|
5
|
In the Columns list, select the Column to designate for the Index or Index Segment.
|
|
7
|
|
1
|
|
2
|
Click Add.
|
|
4
|
Select Partial in the Index Segment Details area to designate the index as partial.
|
|
5
|
In the Columns list, select the Column to designate for the Index or Index Segment.
|
|
7
|
|
1
|
|
4
|
|
1
|
|
3
|
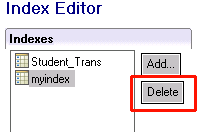
With the Index you want to delete selected, click Delete in the Indexes list.
|
|
4
|
Click Yes to confirm the deletion.
|
|
5
|
|
1
|
|
6
|
|
1
|
|
4
|
From the Columns list, click the desired column designated as the index segment.
|
|
6
|
|
1
|
|
4
|
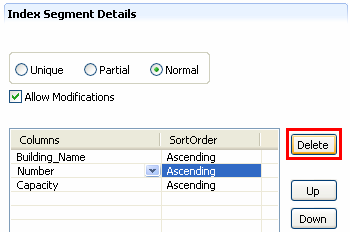
With the index segment you want to delete selected, click Delete in the Index Segment Details Columns list.
|
|
5
|
|
1
|
|
4
|
Click Up to move the segment toward the top of the segment grouping, or Down to move the segment toward the bottom.
|
|
5
|
|
1
|
|
4
|
|
5
|
|
1
|
|
3
|
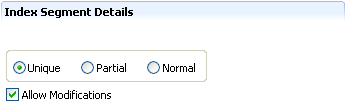
Clear the Unique option in the Index Segment Details area by selecting one of the other options (Partial or Normal).
|
|
4
|
|
1
|
|
3
|
Click Allow Modifications option.
|
|
|
|
|
|
|
|
|
|
4
|
|
1
|
|
2
|
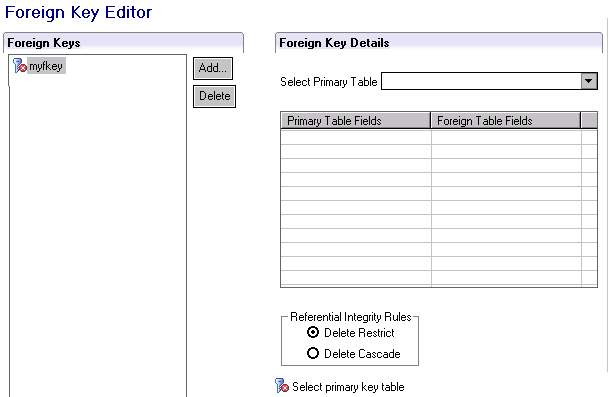
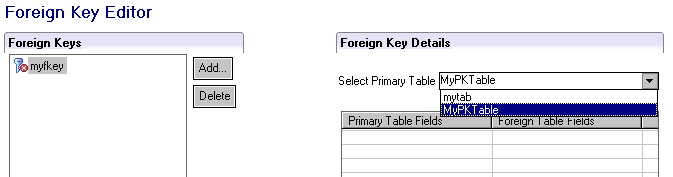
Click Add.
|
|
4
|
Click OK.
|

|
9
|
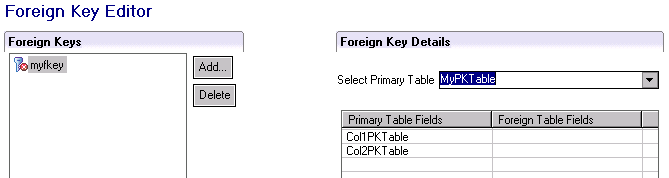
Repeat steps 7 and 8 to match each field listed in the “Primary Table Fields” column with a field in the “Foreign Table Fields” column.
|
|
10
|
|
11
|
|
1
|
|
5
|
|
1
|
|
3
|
Click Delete.
|
|
4
|
Click Yes to confirm the deletion.
|
|
5
|
|
1
|
|
2
|
|
4
|
|
1
|
|
2
|
For the desired statement view, CREATE Statement or ALTER Statement, click the icon in the upper right corner of the view:
|
|
|
|
|
|