|
2
|
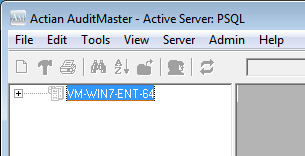
From AuditMaster Viewer, select Server > Add to open a Windows Explorer dialog to select an AuditMaster server.
|
|
3
|
Enter the path to the file amserver to read the settings for the AuditMaster server to which you want to make a client connection.
|
|
4
|
Click Open.
|
|
5
|
Right-click a server configuration to select Login. You may also double-click.
|
|
1
|
|
3
|
Click OK.
|
|
1
|
|
2
|
Select Yes to remove the server.
|
|
2
|
Right-click a server configuration to select Login. You may also double-click the server name.
|
|
4
|
|
6
|
In the list of sections on the left, select Common Settings.
|
|
9
|
Click OK.
|
|
10
|
|
11
|
Using the new path value you chose, enter drive:\PSQL root directory\Audit\DATA to navigate to the location of the amserver file that contains the settings you have just changed.
|
|
12
|
|
13
|
|
14
|
Click Yes to confirm its removal from the list. The status field at the bottom of the main window indicates no server is active.
|
|
17
|
In PSQL Explorer, right-click the Services node and select Stop All Services.
|
|
18
|
|
21
|
|
22
|
In PSQL Explorer, right-click the Services node and select Start All Services.
|
|
24
|
In the AuditMaster Viewer window, right-click the server and select Login. You may also double-click the server name.
|
|
•
|
|
•
|
Access the Status Log from operating system Start menu or Apps screen, or from the installation location (the default is C:\<installation directory>\Audit\Data). This method is especially useful if the viewer is not responding because of a system problem, such as disk full.
|
|
2
|
If needed, set filter options to display only the status records you want. The Clear Fields button allows you to start over on most fields. The filtering options are given in the following list:
|
|
•
|
|
1
|
|
3
|
Click Create User.
|
|
1
|
|
3
|
Click Delete User.
|
|
1
|
Select the Admin > Audit Filter > Trusted List command.
|
|
3
|
Click the Add button.
|
|
4
|
Click Close.
|
|
5
|
|
1
|
Select the Admin > Audit Filter > Trusted List command.
|
|
3
|
Click the Delete button.
|
|
4
|
Click Close.
|
|
5
|
|
These locations are set at installation time to work with a shared volume that is also created by the AuditMaster installer. To meet security requirements, the share can be replaced with an explicit local path name. For instructions, see
Replacing the Network Share with a Local Path. Be advised that doing so blocks remote clients and restricts access to only the local system.
|
||
|
Used with
Automated Archiving settings. By default, the value is –1, which means that the system does not monitor the number of archived files. If the value is greater than zero, then the system retains only that number of the most recent files and deletes the older ones. See
Archives to Keep.
|
||
|
Used with
Automated Archiving settings. By default, the value is –1, which means that the system does not monitor the total size of all archived files. If the value is greater than zero bytes, then the system retains only the most recent files for which the total size is less than or equal to this number of bytes and deletes the older files. See
Archive Disk Limit.
|
||
|
A list of file types to monitor, separated by blanks. Default is btrv, the only allowed value in the current release.
|
||