Viewing Account Information Via 360
The following fields contain NetSuite data and can be applied to the Account record page layout in Salesforce:
• NetSuite Internal Id (Customer Id)
• NS Sales Rep Id
• Credit Hold
• Credit Limit
• Balance
• Overdue Balance
• Days Overdue
• NS Credit Term Id
• NS Customer Category Id
• NS Shipping Item Id
• NS Subsidiary Id
• NS Tax Item Id
• Subsidiary
• Taxable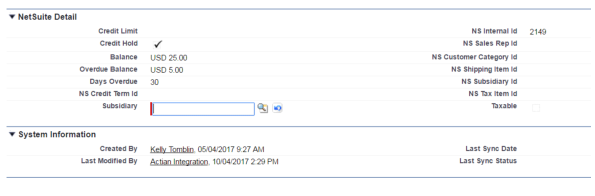
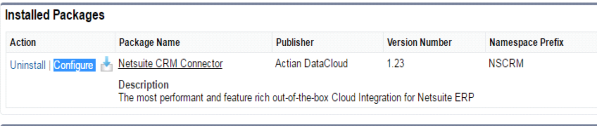
1. Before updating an existing Account in Salesforce, confirm that the Account Post-Link Outbound Schema has been enabled:
a. Go to: Setup > App Setup > Installed Packages. You will see a list of all the Installed Packages in your Salesforce instance.
b. Click on Configure next to the NetSuite CRM Connector.
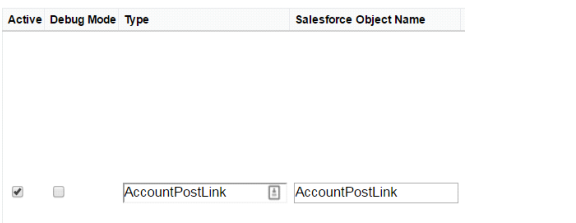
c. Go to Integration Setup & Lists.
d. Click on Outbound Schemas.
e. Confirm the Account Post-Link is Active.
2. Once the Account Post-Link outbound schema has been confirmed as Active, go to the record of the Account you want to update.
3. Click Edit on the Account record.
4. Make the necessary changes.
5. Click Save.
After the Account record in Salesforce has been saved, the NetSuite CRM Connector will then sync the updated information in NetSuite.
Last modified date: 12/14/2021