Install the Integration Agent on Windows
Actian Integration Agent has the following prerequisites:
• Java Runtime Environment 8 or higher
• Windows user with Administrator privileges
To install the Integration Agent on Windows
1. Log in to Windows as either the Administrator user or a member of the Administrators user group.
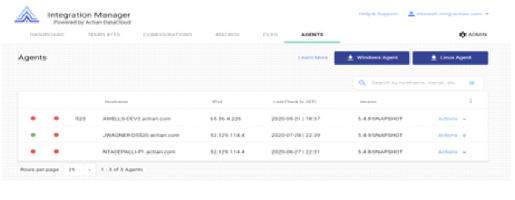
2. Download the latest integration-agent.exe installer from the Agents tab in Integration Manager.
3. Right-click on the installer, choose Run as Administrator and then click Next.
The installer file name is integration-agent-<version>.exe.
4. Click Next to begin the installation.
5. Accept the terms of the license agreement.
6. Make changes to the installation path if needed.
7. Click Install.
The installer extracts the Integration Agent and installs the service.
8. When the installation is complete, click Done.
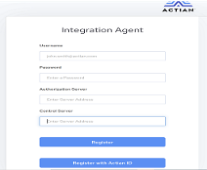
9. If you are installing as an Agent, the Agent Settings portal should automatically start at http://localhost:6001/home once installation is complete.
After installation is complete, the agent runs as a Windows service called Actian Integration Agent.
Installation Locations
The Integration Agent installs data in the following locations:
Uninstall the Agent on Windows
Use the Windows Control Panel to uninstall the Actian Integration Agent.
To uninstall the agent on Windows
1. Open the Windows Control Panel.
2. Click Uninstall a program.
3. Select Actian Integration Agent from the list of installed programs.
4. Click the Uninstall button to launch the wizard.
5. In the uninstallation wizard, click Uninstall.
6. When the uninstallation is complete, click Finish.
Manage the Integration Agent Service on Windows
The Integration Agent service is managed through Windows Services Manager.
To manage the service
1. Open the Windows Control Panel.
2. Click System and Security and then go to Administrative Tools.
3. Double-click on Services.
4. Select Actian Integration Agent from the list of services.
5. Use the Start, Stop, and Restart links to manage the service.
To change the Windows account that runs the Integration Agent
1. Log in to Windows on the machine running the Agent using the Administrator account.
2. Open the Server Manager.
3. Under Configuration, select Services.
4. Stop the Actian Integration Agent service.
5. Right-click on the Actian Integration Agent service and select Properties.
6. Select the Log On tab.
7. Select the This Account option.
8. Enter the login credentials for the appropriate domain account.
9. Click Apply and then OK.
10. Start the Actian Integration Agent service.