Salesforce Page Layout Customization
Account Page Layout Customization
To update an Account layout that syncs with NetSuite
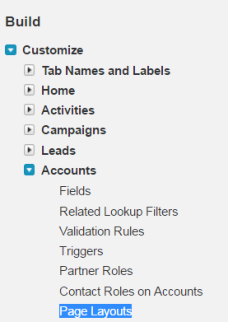
1. Go to Setup > Build > Customize > Accounts > Page Layouts.

2. Click Edit next to the Page Layout you want to edit.

3. Add the following fields to the Account Information section:
• NetSuite Internal ID
• Subsidiary (mark required)
• Last Sync Date
• Last Sync Status
4. Add the following related lists to your Account page layout(s):
a. Transactions
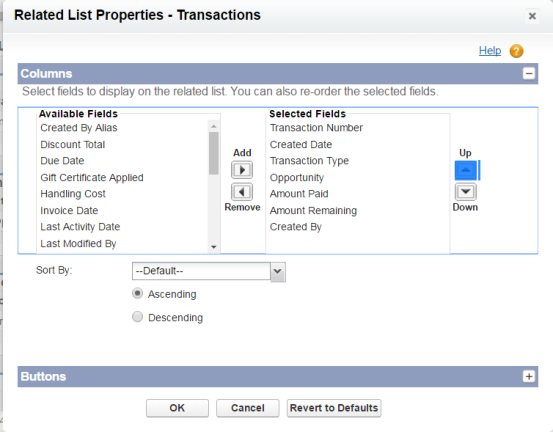
1) Click the wrench (located above the related list name) to edit the related list properties.
2) Add the following fields: Transaction Number, Created Date, Transaction Type, Opportunity, Amount Paid, Amount Remaining, Created By.

b. Orders
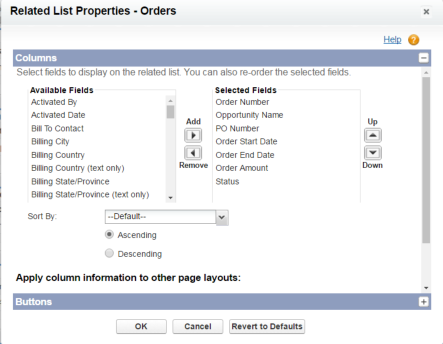
1) Click the wrench (located above the related list name) to edit the related list properties.
2) Add the following fields to the related list: Order Number, Opportunity Name, PO#, Order Start Date, Order End Date, Order Amount, Status.

c. Integration Error Messages
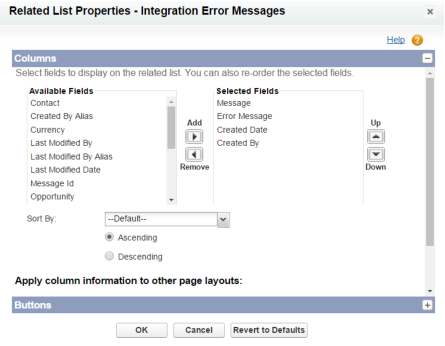
1) Click the wrench (located above the related list name) to edit the related list properties.
2) Add the following fields to the related list: Message, Created Date, Error Message, Created By.

Last modified date: 12/14/2021