How You Can Create a Simple Object-Oriented Application
You can create a simple object-oriented application that selects and updates information from a database. Creating such an application follows these basic steps:
1. Create a user class with methods.
2. Write the class script.
3. Create a composite field on your user frame.
4. Bind a user class to the composite field.
5. Call the user class methods.
6. Run the application.
The following procedures build on your previous work from
How You Can Create a Simple Client/Server Application.
Create a User Class
In this procedure, you will create a user class for use with the ProjectApp1 application you created in
Create an Application. You can create user classes to create a “wrapper” around the project database table, letting you more efficiently read from and write information to the table. You will add two methods to load and save project data.
To create a user class
1. Select the ProjectApp1 application in the Applications portlet of the Develop tab.
2. Click in the Components portlet to activate it.
3. Click File, New, User Class.
The Create User Class dialog opens.
4. Enter ProjectObject in the Name field.
5. Click Create.
The Class Editor window appears.
6. Click the Attributes tab.
7. Click Edit, Insert, From Database Table.
The Select a Database Table dialog appears.
8. Click List Tables.
The Table Selection dialog appears.
9. Select the project table and click OK.
10. Click OK to close the Select a Database Table dialog.
Defined attributes for each column in the database table are listed on the Attributes tab of the Class Editor.
To create methods for the user class
1. Click the Methods tab.
2. Click Edit, Insert, New.
The Class Editor: Create Method window appears.
3. Enter the Name LoadProject.
4. Click Create, and then Apply.
5. Click New to add another method.
The dialog is cleared.
6. Enter the Name SaveProject.
7. Click Create, and then Apply.
8. Click Close to close the Method Properties dialog.
The two new methods are listed on the Methods tab of the Class Editor.
Leave the Class Editor open. You can now write the class script that uses the user class.
Write the Class Script
In this procedure, you will write a class script that uses the ProjectObject class you created in
Create a User Class.
To write the class script
1. In the open Class Editor for the ProjectObject user class, click Tools, Script.
The Script Editor opens.
2. Enter the following code:
METHOD SaveProject()=
{
update project
set project_name = :CurObject.project_name,
assigned_to = :CurObject.assigned_to,
level_of_effort = :CurObject.level_of_effort,
due_date = :CurObject.due_date,
start_date = :CurObject.start_date,
date_completed = :CurObject.date_completed
where project_id = :CurObject.project_id;
commit;
}
METHOD LoadProject()=
{
SELECT project_name AS :CurObject.project_name,
assigned_to AS :CurObject.assigned_to,
level_of_effort AS :CurObject.level_of_effort,
due_date AS :CurObject.due_date,
start_date AS :CurObject.start_date,
date_completed AS :CurObject.date_completed
FROM project
WHERE project_id = :CurObject.project_id;
commit;
}
3. Save the script and close the Script Editor.
4. In the Class Editor, click Tools, Compile to compile the script.
“Methods were successfully compiled” is displayed in the Class Editor status bar.
5. Click File, Save in the Class Editor, and then close the Class Editor.
The ProjectObject user class is listed in the Components portlet of the Develop tab.
Leave the frame open. You can now add a composite field to a frame that uses the user class.
Create a Composite Field
In this procedure, you will create a composite field. A
composite field is a field that groups other fields together. The composite field you create will use the ProjectObject class you created in
Create a User Class.
You will create the composite field on the ProjectFrame user frame you created in
Create a Frame and Add Fields and Controls to It.
To create a composite field
1. Double-click to open ProjectFrame in the ProjectApp1 application (Develop tab).
The frame is opened.
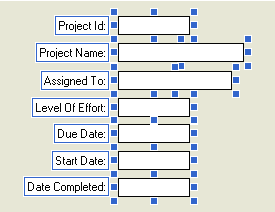
2. Use the mouse to select (“lasso”) all fields and labels.
For example:
3. Click Group, Matrix Field on the floating menu bar.
A matrix field appears as a rectangle that contains fields arranged in rows and columns. The component fields stay aligned even if you rearrange or reorder them.
4. Scroll through the Property Inspector and click the property Name.
5. Enter project and press Enter.
The matrix field is now named project. You can reference this name in scripts.
Leave the frame open. You can now bind the ProjectObject user class to the project matrix field.
Bind a User Class to a Composite Field
In this procedure, you will bind the user class ProjectObject to the matrix field, project.
You must have the ProjectFrame user frame opened from the previous procedure,
Write the Class Script. The matrix field, project, should be selected.
To bind the user class to the matrix field
1. Scroll to DataType in the Property Inspector and click the property.
A dialog appears.
2. Click the Reference option.
The dialog changes.
3. Click List Classes.
The Select a Class dialog appears.
4. Click projectapp1 in the Application list.
5. Click projectobject in the User Class list.
6. Click OK to close the Select a Class dialog.
7. Click OK to close the Data Type dialog.
The project matrix field now uses the ProjectObject class as its data type.
Leave the frame open. You can now call the user class methods in your frame script.
Call User Class Methods
In this procedure, you will edit the ProjectFrame frame script to call the methods in the ProjectObject user class.
You must have the ProjectFrame user frame opened from the previous procedure.
To reference the user class in the frame script
1. Click Tools, Script on the Frame Editor’s floating menu bar.
The Script Editor opens.
2. Replace the SQL for selectbutton and updatebutton with the following code:
on click selectbutton=
{
project.LoadProject();
field(project).updfield();
}
on click updatebutton=
{
project.SaveProject();
}
3. Save the script and close the Script Editor.
4. Click Tools, Compile to compile the script.
Note: If compilation errors are displayed, double-check your code to ensure that you have entered it correctly, and then try again.
Leave the frame open. You can now run the application.
Run an Application Using the Debugger
In this procedure, you will run the modified ProjectFrame user frame to test the script you edited in
Call User Class Methods.
You must have the ProjectFrame user frame opened from the previous procedure.
To reference the user class in the frame script
1. Click Debug, Go to run the frame.
2. Enter 1 in the Project Id field and click Select.
Data from the first record in the project table is displayed in the field.
3. Change the name of the project and then click Update.
4. Click OK to commit your changes.
5. Click Debug, Go again.
6. Enter 1 in the Project Id field and click Select.
Your modified data from the first record in the project table is displayed in the field.
7. Click OK to close the frame.
8. Save and Close the ProjectFrame.
Congratulations, you have successfully modified an application that uses object-oriented methods!