Pull-down and Slide-off Menus
Pull-down (see
pull-down menu) and
slide-off menus (see
slide-off menu) consist of a menu button that, when selected, displays a submenu of items. These items can be of any menu type, including another pull-down or slide‑off menu.
Note: You cannot place a slide-off menu directly on the menu bar. All menu bar buttons must be pull-down menus to display the menu below the menu bar.
Create a Pull-down Menu
You can create a pull-down menu using the Menu Editor, which you access from the Frame Editor.
To create a pull-down menu
1. Click Tools, Menu on the Frame Editor's floating menu bar.
The Menu Editor appears.
2. Click Insert, Pull-down/Slide-off Menu.
3. Click in the layout area.
For all new frames except those created with the menu template, Workbench automatically places the pull‑down menu in the upper left corner of the form.
If, however, a frame is created with the menu template, Workbench provides a default File menu, as noted previously. Click the default File menu button to add a new pull-down menu, as shown in the following illustration:
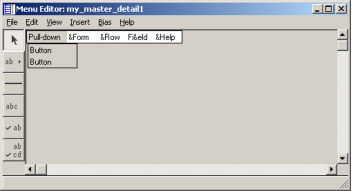
In either case, Workbench inserts a pull-down menu, with a default label of “Pull-down,” and a single menu button, with a default label of “Button.”
4. Select the pull-down menu and use the Property Inspector to change the Name property to file and the TextLabel property to &File.
The default field name, “fieldn,” is replaced by “menu.file” in the Field List. Dot notation is used in 4GL code to reference submenu items on a pull-down or slide‑off menu.
Note: The “&” can be used in the creation of speed keys. If you do not want to use speed keys with this menu item, enter only
File for the TextLabel property. For more information about assigning speed keys, see
How You Can Assign Speed Keys.
5. (Optional) Specify other properties for the pull-down menu.
6. Select the default button, “Button.”
The Property Inspector changes focus.
7. Use the Property Inspector to change the Name property to save and the TextLabel property to &Save.
8. (Optional) Specify other properties for the menu button.
9. Close the Menu Editor.
10. Save your changes by clicking File, Save in the Frame Editor.
Create a Slide-off Menu
Slide-off menus work much like pull-down menus, except slide-off menus appear to the side of the menu button, instead of below it. You can create a slide-off menu using the Menu Editor, which you access from the Frame Editor.
Note: If you have no buttons on your menu bar, first add a pull-down menu button. For more information, see
Create a Pull-down Menu.
To create a slide-off menu
1. Click Tools, Menu on the Frame Editor's floating menu bar.
The Menu Editor appears.
3. Click Insert, Pull-down/Slide-off Menu.
4. Click at the top of the default menu button, “Button,” to insert a slide-off menu between it and the pull‑down menu, “Pull‑down.”
Note: When you are inserting a new menu item, if you click the lower part of an existing menu item, the new item is inserted below the existing menu item. However, if you click the upper part of an existing menu item, the new item is inserted above the existing menu item.
Workbench creates a default slide-off menu, with a default label of “Slide-off,” and one menu button for the first item in the submenu, as shown here:
Note: You can add additional items to the submenu, as you will see in other examples.
5. Select the slide-off menu and use the Property Inspector to set its properties, such as Name and TextLabel.
6. Add menu buttons, toggles, or lists on the pull‑down menu.
For information, see:
7. Use the Property Inspector to set each menu item's properties, including FocusBehavior, Name, SpeedKey, and TextLabel.
Note: For complete descriptions of each menu item property, see the corresponding sections in this chapter and
Common Menu Properties.
8. Close the Menu Editor.
9. Save your changes by clicking File, Save in the Frame Editor.
Pull-down and Slide-off Menu Properties
Pull-down and slide-off menus have properties that are common to all menus and menu items. Therefore, all of the properties for pull-down menus and slide-off menus are described in
Common Menu Properties.