Using DataExchange
The following topics provide in-depth information for using DataExchange in daily operations. They include discussions about fundamental concepts, as well as procedural information for dealing with some of the common scenarios you may encounter during replication.
Activation
Activation is the process of creating a new database for replication, or enabling an existing one, and defining it as belonging to a site within a replication network so that it can replicate. Because activation associates a database with a site, activating a database and activating a site mean the same thing.
The Deployment Wizard and dxdeploy command line utility both activate replication databases automatically as part of deployment. The dxact command line utility provides a manual method of activation as well as the flexibility to specify options such as preprocessing of starter data. For this discussion, we use dxact to activate the sample database, but first it’s important to first understand a few concepts in the activation process:
Activation and Data Source Names
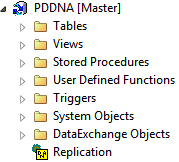
When you activate a database, DataExchange creates an internal system data source name (DSN) to point to the activated copy. In addition, DataExchange installation creates a database called PSQL DataExchange Database Network Analysis (PDDNA), which is the internal replication database. This database appears in Zen Explorer with the DNA icon in its Replication node.

Caution! Do not alter or otherwise directly attempt to use the internal DNA database (PDDNA). Doing so can corrupt the DataExchange installation.
Activating First and Partner Sites
The First Site special because it contains information needed to manage the replication network. The First Site must be activated before any of the Partner Sites so that they each can obtain copies of the information. Once the First Site is activated, you may activate your Partner Sites in any order. You can use the Deployment Wizard, dxdeploy.exe or dxact.exe on each Partner Site machine to activate it.
Tip... The replication engine must be running to activate a database.
If possible, each Partner Site machine should have a network connection to allow it to communicate with the First Site so that the initial replication session can start immediately. This is not mandatory, however. You can perform the initial replication at a later time if you prefer. In the Data Synchronization edition, a Partner Site cannot replicate with other Partner Sites until it performs an initial replication with the First Site.
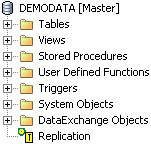
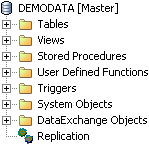
After a successful activation, ZenCC displays the database as activated, with the Replication node icon showing a letter A.

Once the initial replication has succeeded, the newly installed site is fully aware of all administrative data in that network, including all replication schedules.
For more information
Specific information about using each of the DataExchange deployment utilities is available in Using the DataExchange Utilities and Services. The following table provides specific reference information.
Activation Method | For more information... |
|---|---|
Deployment Wizard (Dpwizard.exe) | See dpwizard |
Dxdeploy.exe | See dxdeploy |
Dxact.exe | See dxact |
To activate using dxact.exe
1. On the site machine you want to activate, open a command prompt window to start dxact.exe.
2. At the prompt, type a command similar to the following:
dxact demodata /FI
This example activates the demodata database on the First Site using the dxact.exe utility. By default, messages from dxact.exe are written to the dxact.log file, not to the screen. To view the messages on the screen while dxact.exe runs, use the /LOGFILE= option. To do so, you would enter a command similar to the following:
dxact demodata /Logfile= /FI
The /FI option specifies you are activating the First Site, but you should always run dxact.exe from the site you want to activate – remote activations are not available in DataExchange. For the complete list of dxact.exe options available, see dxact.
Now that we’ve covered the basics of activation, the next topics are deactivation and reactivation.
Deactivation
Deactivation is the disabling of an activated database in a replication network. Deactivation uses the dxdeact utility as explained in Using the DataExchange Utilities and Services.
If you deactivate a database on the First Site, Control Center displays the First Site database as a design template, since it was used to design the database for the replication network. When the First Site is deactivated, the Replication node icon displays a letter T. 

When a Partner Site is deactivated, in Control Center on that site the Replication node icon for the database no longer displays a letter A for activation. 

Other sites do not detect a deactivated site until replication occurs, which fails for the deactivated site. This is normal and generates an error message similar to the following in the dre.log file:
E 019f 0301-15:46:25 Partner site Partner_Site_2 (site number: 00LFLU) has been removed from the replication network - it cannot replicate with any other site.
After the failed replication, the error no longer occurs because all sites in the replication network have detected the deactivated site.
To deactivate using dxdeact.exe
1. On the site machine you want to deactivate, open a command prompt window to start dxdeact.
2. At the prompt, type a command similar to the following:
dxdeact demodata
This example deactivates the demodata database using the dxdeact utility. By default, messages from dxdeact are written to the dxdeact.log file, not to the screen. To view the messages on the screen while dxdeact runs, use the /LOGFILE= option just as you did earlier with dxact.exe. It’s helpful to note that all the DataExchange Utilities provide the /LOGFILE= option to control logging output. For the complete list of dxdeact.exe options available, see dxdeact.
Reactivation
Reactivation is the reenabling of a deactivated site for replication. A database must be deactivated before it can be reactivated. Reactivation is, in essence, the same as activation in that you use the dxact utility in the same manner as you did when you activated.
If you deactivate a First Site, you must perform a manual replication if you reactivate the First Site. After you reactivate the First Site, you must manually initiate a replication session from each Partner Site to the First Site. The replication sessions ensure that all available sites appear on the Initiate Replication dialog.
Note: Manually initiating a replication session is not required if you deactivate/reactivate a Partner Site. It applies only to a First Site.
If you deactivate a First Site, you must perform a manual replication if you reactivate the First Site. After you reactivate the First Site, you must manually initiate a replication session from each Partner Site to the First Site. The replication sessions ensure that all available sites appear on the Initiate Replication dialog. This action is not required if you deactivate/reactivate a Partner Site. It applies only to a First Site.
Adding Dynamic Tables to an Activated Database
You applications may add tables to a Zen database that did not exist at the time database replication was set up in DataExchange. DataExchange provides a way to include these new tables in – or exclude certain tables from – the set of replicated tables for an activated database. Only table files should be included because only tables may be replicated. Any type of file may be excluded, but whether or not you exclude them, files other than tables are not replicated.
The new tables are identified by a pattern-matching algorithm, which uses glob-style patterns in both regular and dir expressions. You specify which file patterns you want the algorithm to use. Blank by default, the patterns are the only input required from you. DataExchange does the rest automatically.
DataExchange first compares file names for the include pattern then compares file names against the exclude pattern. Only files whose names pass both comparisons are included. For example, suppose you specify c:\mydata\*.d?? as an include pattern. If you specify an exclude pattern of c:\mydata\*.ddf, then all files in c:\mydata will be included except for ones with a file extension of “ddf.”
Tip... For a detailed discussion about the types of expressions you can use as include and exclude patterns with dxdynpath, see Types of Expressions.
The inclusion or exclusion of tables begins when a table is successfully opened with the database open API. DataExchange then determines whether the table is identified as one to be replicated (that is, is the table new to replication). If the table is new and its name matches only with the exclude pattern, DataExchange takes no replication action on the table. DataExchange includes a new table if its name does not match with the exclude pattern but does match with the include pattern. Initially, after a successful open, the table is simply identified to DataExchange as being new. Data in the new table is not immediately replicated.
The next replication process (for example, from a scheduled replication) prepares the new table for replication and synchronizes the replication information about it on all sites. The second replication process includes the new table. Note, then, that the actual replication of data to or from a new table requires two replication cycles.
Note: Inclusion of dynamically created tables applies only to Real-Time Backup replication. Also, the dynamically created tables must be on the machine where the database application is running. That is, the tables must be on the machine that serves as the source location from which data is replicated.
Before you Begin
If you’re unfamiliar with expressions or have had little exposure to working with them, we strongly recommend you first review Types of Expressions to gain a basic understanding of how to work with the different types of expressions.
Caution! Any file used with the dxdynpath utility requires system keys, which are needed by Zen for transaction logging purposes.
Include File Patterns
In our example database Demodata, we’ll automatically generate a set of tables every day that contain the attendance records for each campus. This is important data that must be included in the replication. We’ll add an include pattern using dxdynpath so these tables get replicated as well. The table name uses a naming convention of attend<campusid>.mkd, where <campusid> is the three letter campus code.
Caution! This topic applies only if your application dynamically creates new tables for an activated database. This process is only recommended as a solution for tables that are added dynamically.
To include new tables for replication
1. On the First Site, open a command prompt and type the command:
dxdynpath /t=include /pa="dir attend*.mkd" append demodata
2. Verify that the include pattern is there by typing the following command:
dxdynpath /t=both show demodata
A message should display that lists the name and version of the dynamic table configuration and test utility, and additional information such as the following:
INCLUDE pattern is "dir attend*.mkd"
EXCLUDE pattern is ""
EXCLUDE pattern is ""
You may want to manually initiate replication after you specify new files to include. This completes the first cycle of replication required to prepare the dynamic tables for replication. The new tables are then ready for the second cycle (for example, a scheduled replication) in which data is replicated.
Exclude File Patterns
Now let’s fine tune our pattern expressions for our example database. We’ve included all of the attend*.mkd files, but there is a cumulative file (attendall.mkd) that gets created too. Since we have all the individual files that are included in the cumulative one, we don’t really need that file replicated. So, we’ll exclude it from our pattern matching.
To exclude files from replication
1. On the First Site, open a command prompt and type the following command:
dxdynpath /t=exclude /pa="dir attendall.mkd" append demodata
2. Verify that the exclude pattern is there by typing the following command:
dxdynpath /t=both show demodata
A message should display that lists the name and version of the dynamic table configuration and test utility, and additional information such as the following:
INCLUDE pattern is "dir attend*.mkd"
EXCLUDE pattern is "dir attendall.mkd"
These simple examples illustrate how dxdynpath uses pattern matching to determine what files are replicated. For more detail on using dxdynpath and the types of expressions you can use, see dxdynpath.
Changing a Table Structure in an Activated Database
You may have a situation where a table that is currently part of a replication design changes structurally, or its system keys are updated, and these changes need to be synchronized with othersites. You’ll need to be sure that these changes are captured in your replication design, are synchronized across sites, and that you are able to successfully replicate with the changes in place.
Before you Begin
We strongly recommend that you confirm the following items before beginning this procedure:
• Make sure that the replication schedules are currently disabled and that no users are working on the system. This procedure includes deactivating the database, and it is always a good practice to disable any replication schedules before deactivation.
Caution! It is important that no database user or application is active while tables are being modified because any changes to the database cannot be captured while databases are deactivated.
• It is critical that the system keys for records in each user table are accounted for in the corresponding replication table, which is prefixed by the letters PDC. This is the mechanism used to track which records need to be sent to the other sites in the replication network. If a user table and PDC table become disconnected because of incorrect system keys, it can cause replication to fail. For more information, see PDC Replication Tables.
• When you add or remove columns from the table at the First Site, make certain you remember to make the same changes to the table on the Partner Site so that the DDFs reflect the same structure for the tables.
• The procedures explained in this documentation assume that all sites in a replication network have been synchronized before you make any schema changes.
The high-level steps needed to complete this procedure are as follows:
Clone PDC Tables
Although it is not required to use a blank copy of the PDC table, doing so will:
• Reduce PDC table size by including only new records, lessening transmission time to the other sites.
• Speed up the dxsynctables process because dxsynctables does not have to verify preexisting records in the PDC table.
To clone PDC tables
1. Identify tables that were modified in the user data, usually found on the customer production site.
2. Find the replication table for each of modified table. Replication table names have a PDC prefix. Their default location is C:\ProgramData\Actian\Zen\<database name>\DX_<project name>.
3. Use the Zen utility butil to clone the PDC tables, then replace the existing ones with the clones.
Tip... For information on using the butil utility to clone tables, see Advanced Operations Guide.
Activate the First Site and Sync Tables
1. Activate the First Site using the dxact.exe command.
dxact /FI <Database_DSN>
For example, to activate the Demodata sample database, the command is dxact /FI demodata.
2. For each modified table, run this command from a command prompt:
dxsynctables <TableName> <DSN>
Note: This process may take some time to run, depending on the number of records contained in the user table. Tests show that in cases where there are several million records or more, disabling L2 caching can reduce the population times and speed up this process significantly. Make sure to reenable L2 after the user is finished with all the tables.
Copy Files and Activate the Partner Site
To copy files
1. Copy the newly modified user tables and newly populated PDC tables to the appropriate directories at each of the other sites in the replication network. Make certain that you overwrite the already existing tables there.
2. Activate each Partner Site using dxact.exe and the /pa[rtneraddress]=<string> option to designate the site with which you will replicate.
For example, if the First Site address is SiteA, you would enter a command similar to the following:
dxact /pa=SiteA <Database_DSN>
Verify the Replication Session
To verify the replication session
1. On the each site that should have replicated, browse to the LogFiles directory.
This directory is C:\ProgramData\Actian\Zen\Replication\LogFiles.
2. Open the file dre.log and check for messages indicating success or errors.
3. Reenable replication schedules.
You may now allow your users to return to the system.
Last modified date: 12/01/2023