Teams
Bring Actian AI Analyst's AI agents directly into your Microsoft Teams workspace for fast, conversational access to business data.
Prerequisites
- System administrator rights: Integration setup must be completed by a system administrator on your Microsoft Tenant.
- Teams Permissions: You must have permission to upload custom apps in Teams. This may require your Teams system administrator to update app policies.
Info
For most organizations, uploading a custom app is restricted. If you can't upload, ask your Teams system administrator to enable "Upload custom apps" for your user.
Step 1: Start the Teams Integration in Actian AI Analyst
- Go to Actian AI Analyst → Settings → Integrations.
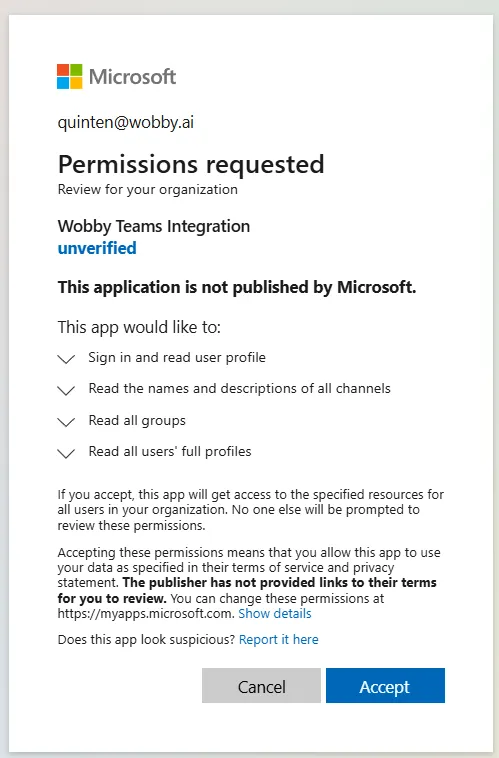
- Find Microsoft Teams and click Connect.
- Authorize the Teams connection when prompted.
- Once authorized, you'll be redirected to the Integrations page. Status should show Connected.
Step 2: Download the Actian AI Analyst Teams Bot
- Click Download Teams Package to get the ZIP package:
teams-bot-package.zip
Step 3: Enable Custom App Uploads (if needed)
To upload the Actian AI Analyst bot, your Teams policy must allow custom app uploads:
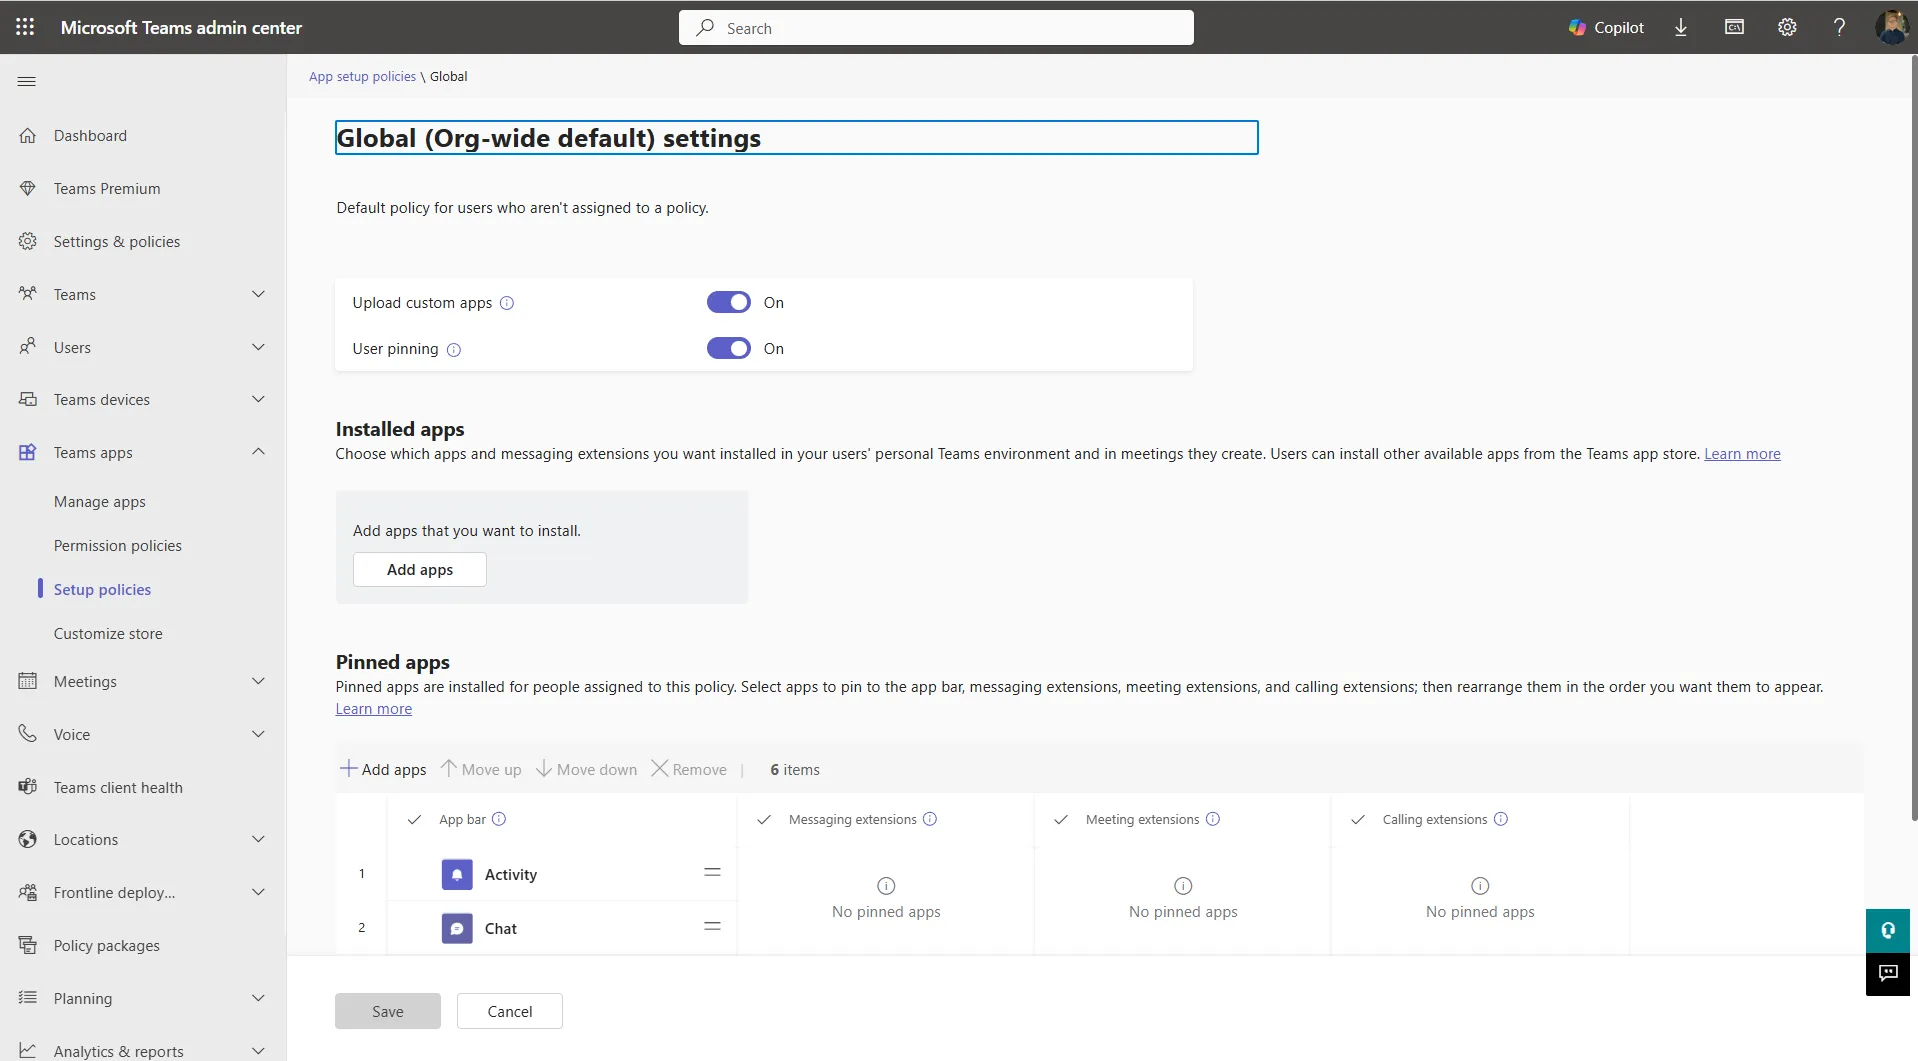
- Open the Microsoft Teams Admin Center.
- Navigate to Teams Apps → Permission policies.
- Edit (or create) a policy for your user:
- Set Upload custom apps to On.
- Apply the policy to your account.
Step 4: Upload the Bot to Teams
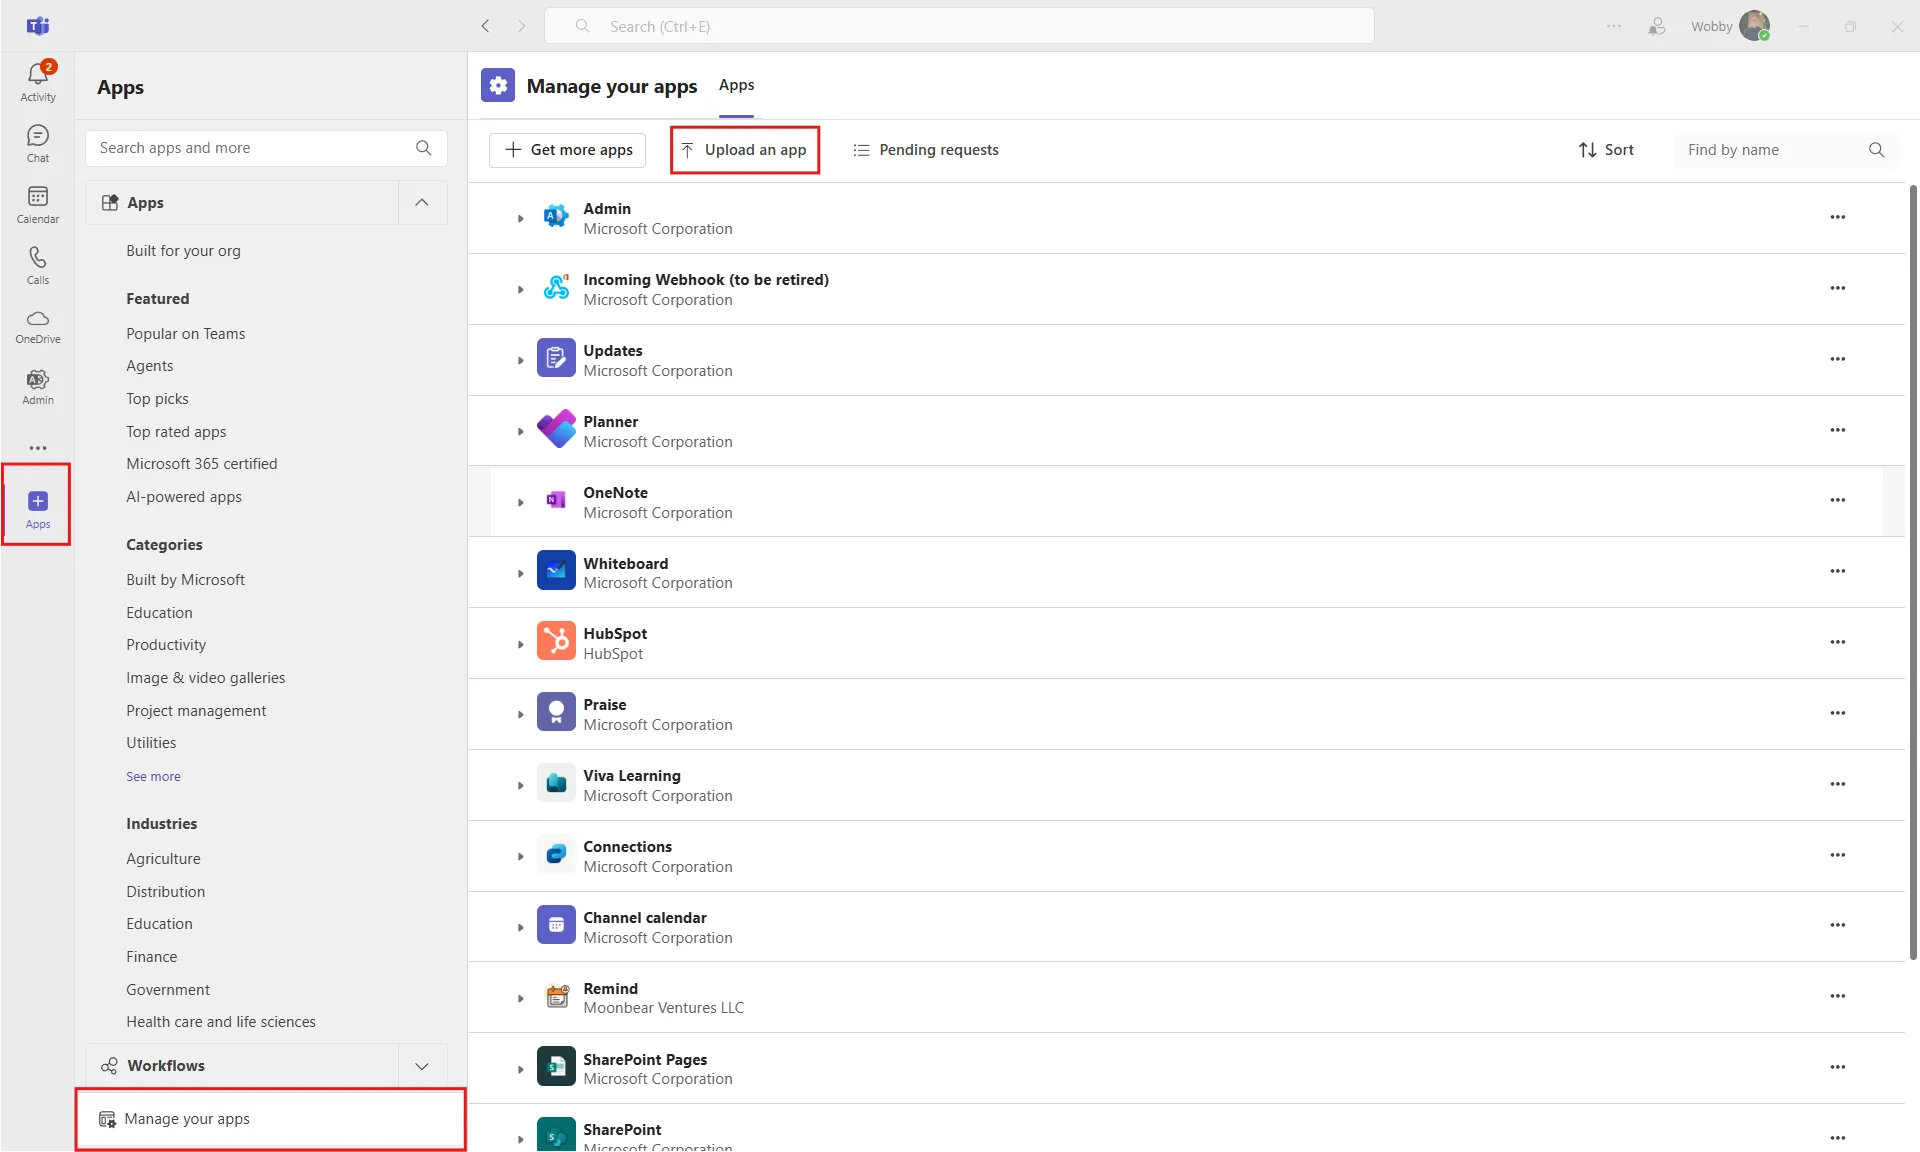
- Open the Teams desktop app.
- Go to Apps → Manage your apps → Upload an app.
- Choose how you want to upload:
- Upload a custom app:\ Makes the bot available for you to add to specific channels.
- Upload an app to your org's app catalog:\ Makes the bot available for all users in your organization. (Recommended for team-wide use.)
- Select
teams-bot-package.zipand click Add.
Warning
Personal chats (DMs) and group chats are not supported. The bot only works in standard Teams channels. Make sure to add it to a channel, not a DM or group chat.
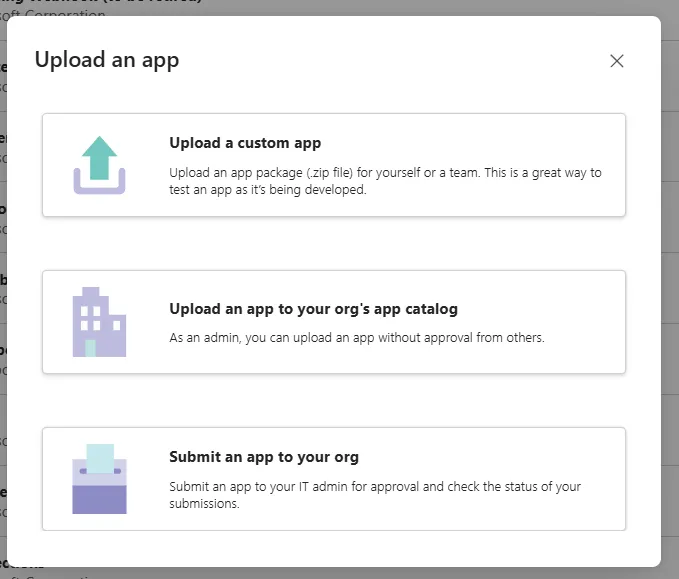
Choose how you want to upload
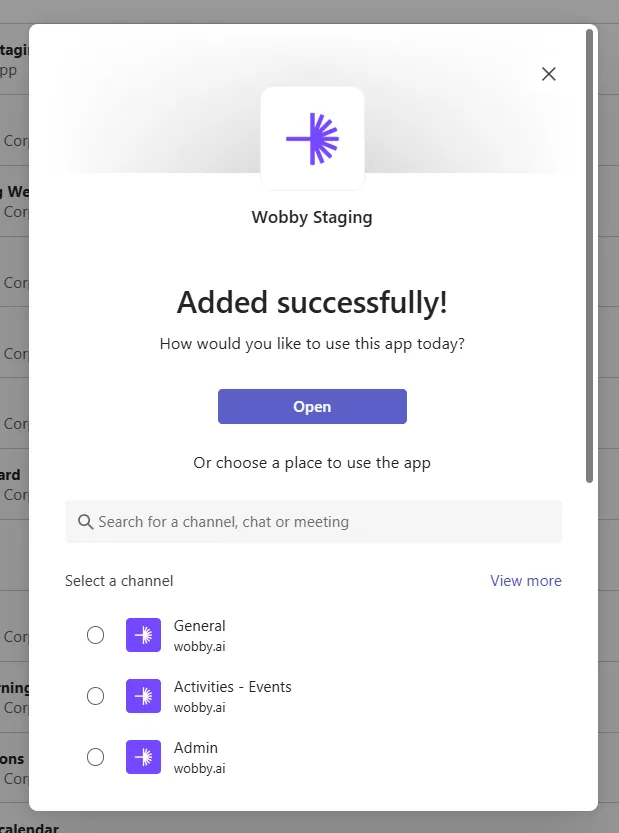
Step 5: Add the Bot to a Channel
- After uploading, add the bot to a standard Teams channel (not a group chat or DM).
- To add to a channel:
- Pick the desired channel when prompted during upload, or add the bot to a channel later via Teams.
Info
The bot can support multiple agents. Each channel can have its own assigned agent.
Step 6: Link Agents to Teams Channels in Actian AI Analyst
- In Actian AI Analyst Studio, open the agent you want to use in Teams.
- Click Deploy → Deploy to Teams.
-
Select the Teams channel and link it to your agent.
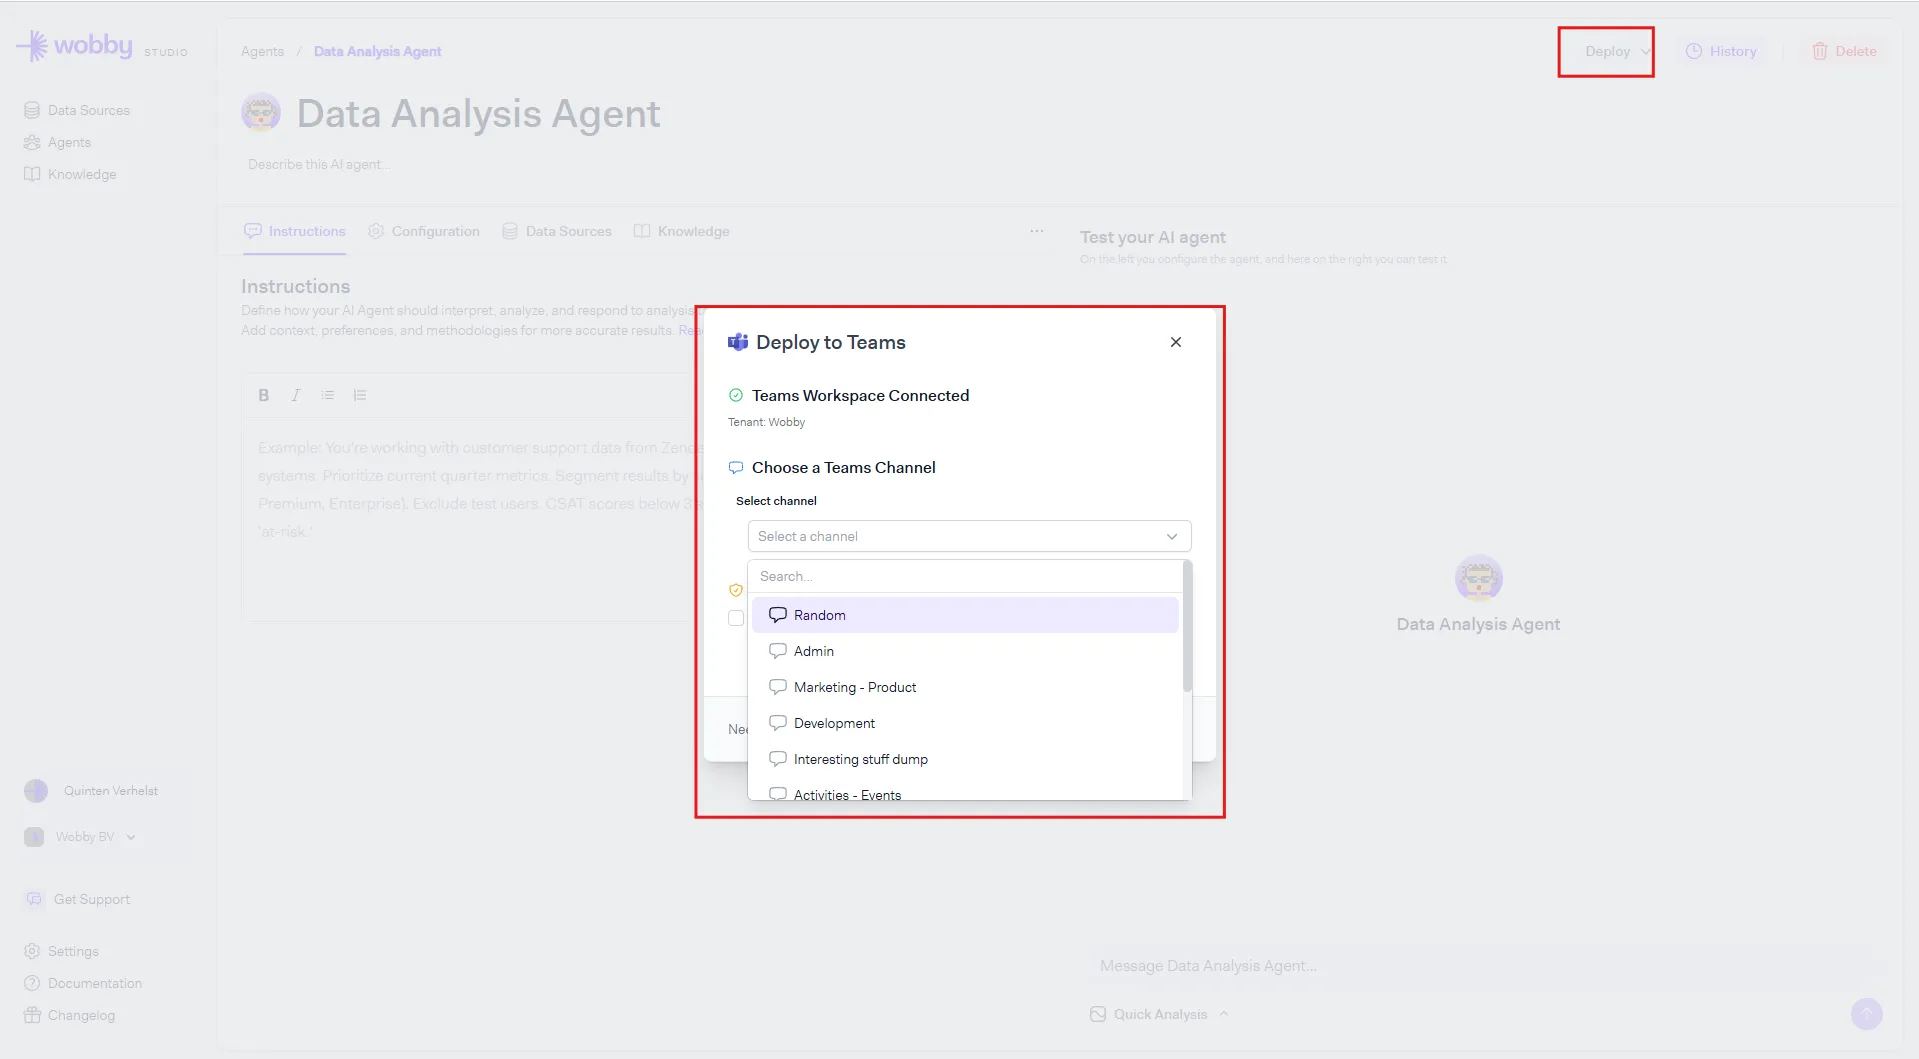
Info
The bot will only respond in the channel you link here. This is by design — it lets you control exactly who has access to which agent and the data it can query. If someone tags the bot in a different channel, they'll receive a message letting them know it isn't available there.
Step 7: Start Using Actian AI Analyst in Teams
- In the channel where the bot is present, mention the bot (
@ActianAIAnalyst) to ask questions or trigger actions. - The bot will only respond in the channel you configured in Studio. Tagging it in other channels will not work.
- Add
--planto your query to trigger Plan Mode. The previous--deepflag has been removed.
Additional Notes
- Troubleshooting:
- If you can't upload, double-check Teams app policies.
- If the bot isn't responding, verify agent linkage in Actian AI Analyst Studio.
- If you see a message saying the bot isn't available in a channel, make sure you're using the correct channel that was linked in Studio — the bot does not respond in DMs, group chats, or unlinked channels.
That's it! You're ready to use Actian AI Analyst's AI agents in Microsoft Teams.
Need support? Send an email to info@wobby.ai or reach out to us via the Get Support button in the sidebar - our team is happy to help!